Setup
Setup takes about two minutes and covers two things: granting notification access (required for the app to work at all), then a couple of battery settings that keep your conversations Ready for longer.
Step 1 — Allow WristMSG notifications
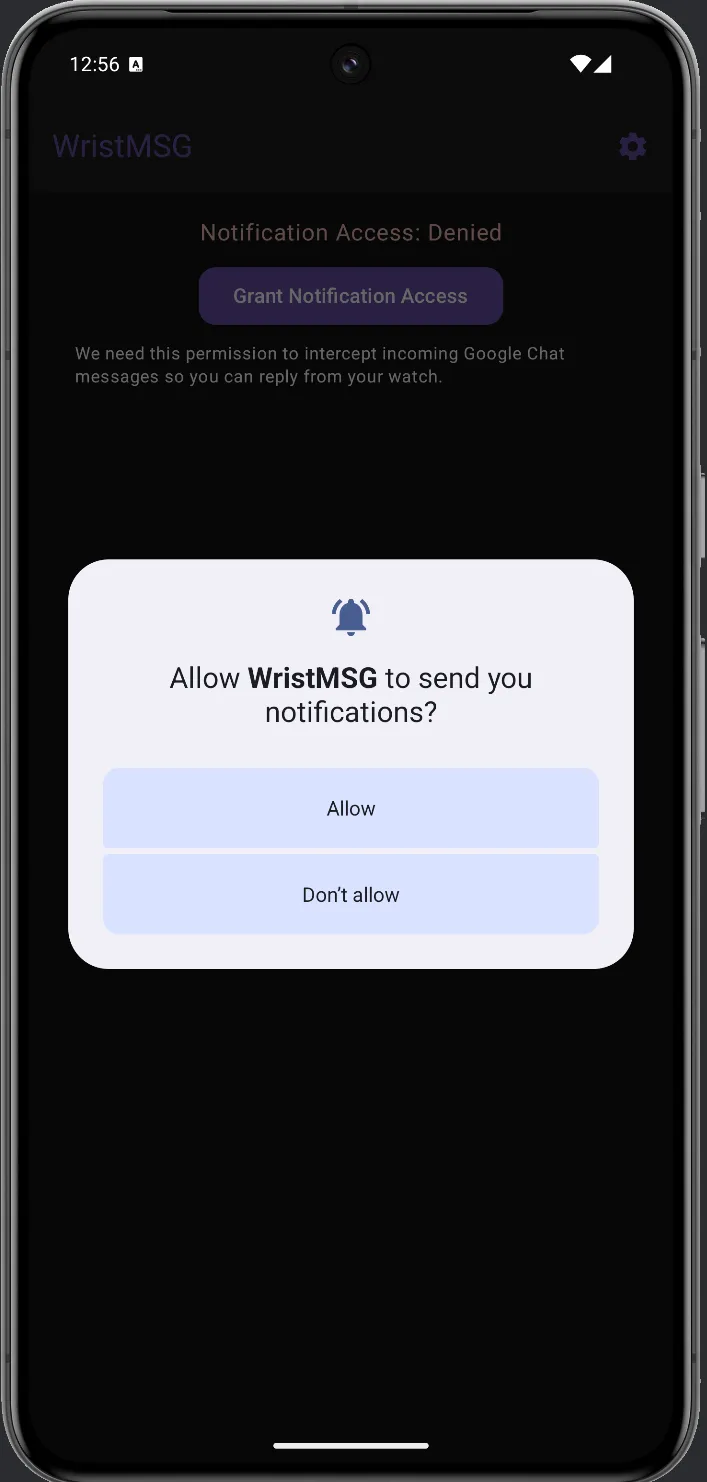
Section titled “Step 1 — Allow WristMSG notifications”The first time you open WristMSG, Android asks if it can send you notifications. Tap Allow — WristMSG uses this for status updates such as the Keep-Alive service notification when it’s running in the background.
Part 1 — Grant notification access
Section titled “Part 1 — Grant notification access”WristMSG reads incoming Google Chat notifications to bridge messages to your watch. This is the core permission that makes it work.
Step 2
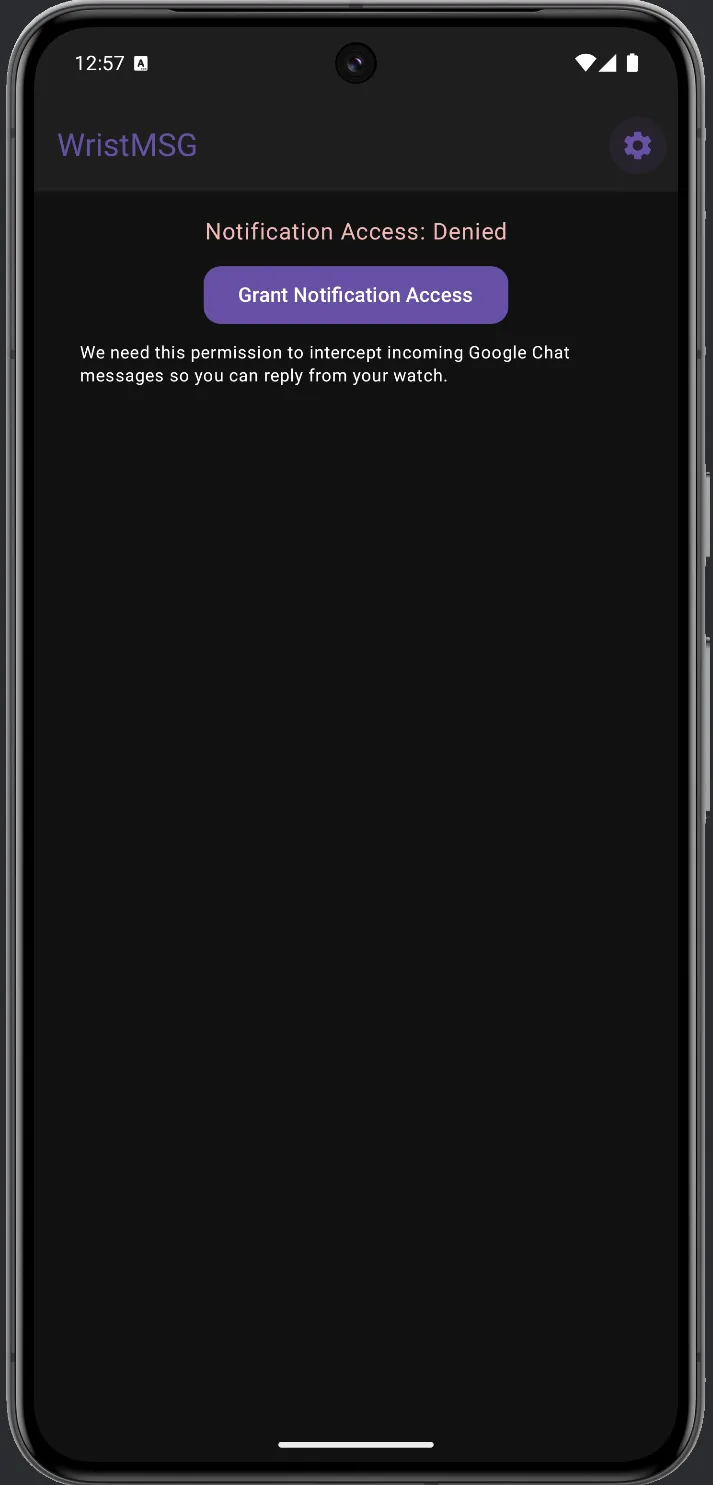
Section titled “Step 2”Open WristMSG. The home screen shows Notification Access: Denied in red. Tap Grant Notification Access.
Step 3
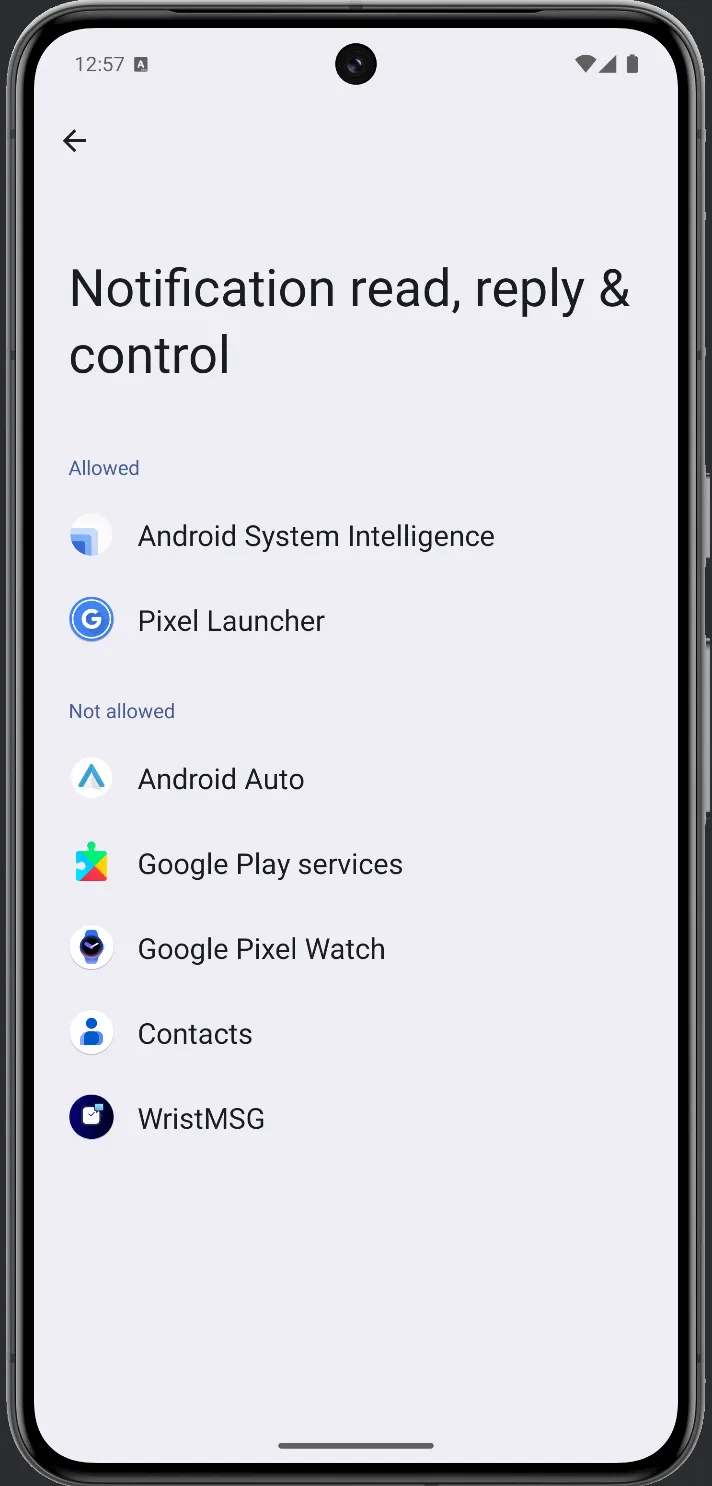
Section titled “Step 3”Android opens Notification read, reply & control. Scroll down to the Not allowed section, find WristMSG, and tap it.
Step 4
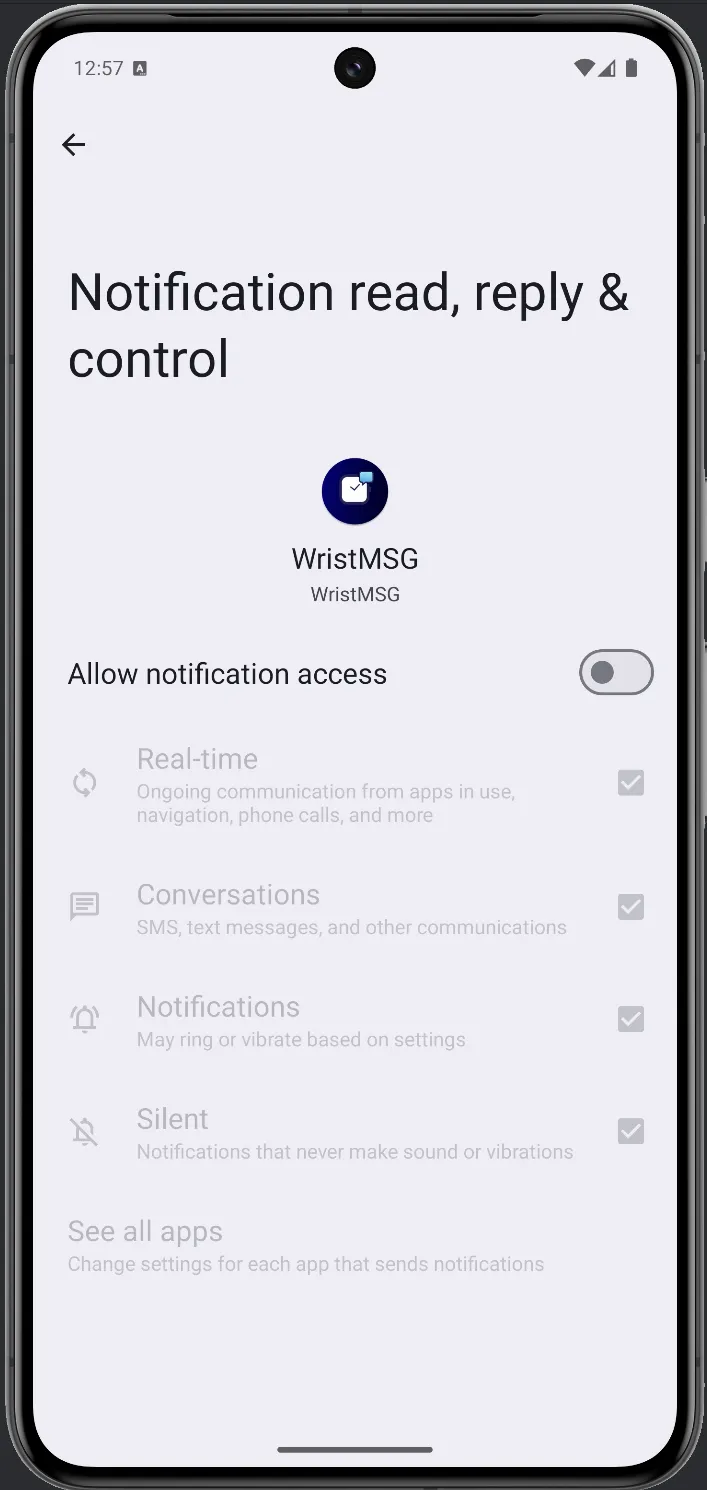
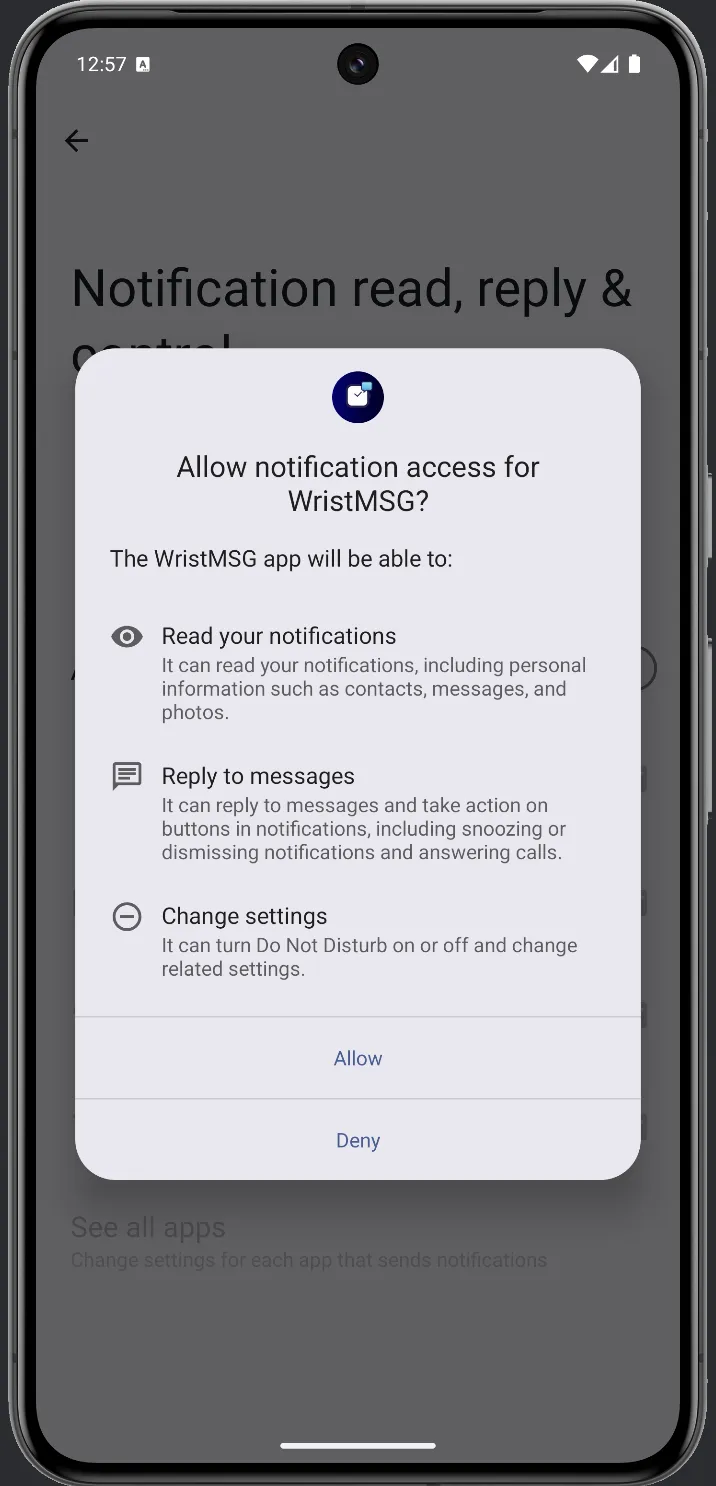
Section titled “Step 4”You’ll see the WristMSG notification access page with the toggle off. Tap Allow notification access. A dialog explains what WristMSG will be able to do — tap Allow.
Step 5
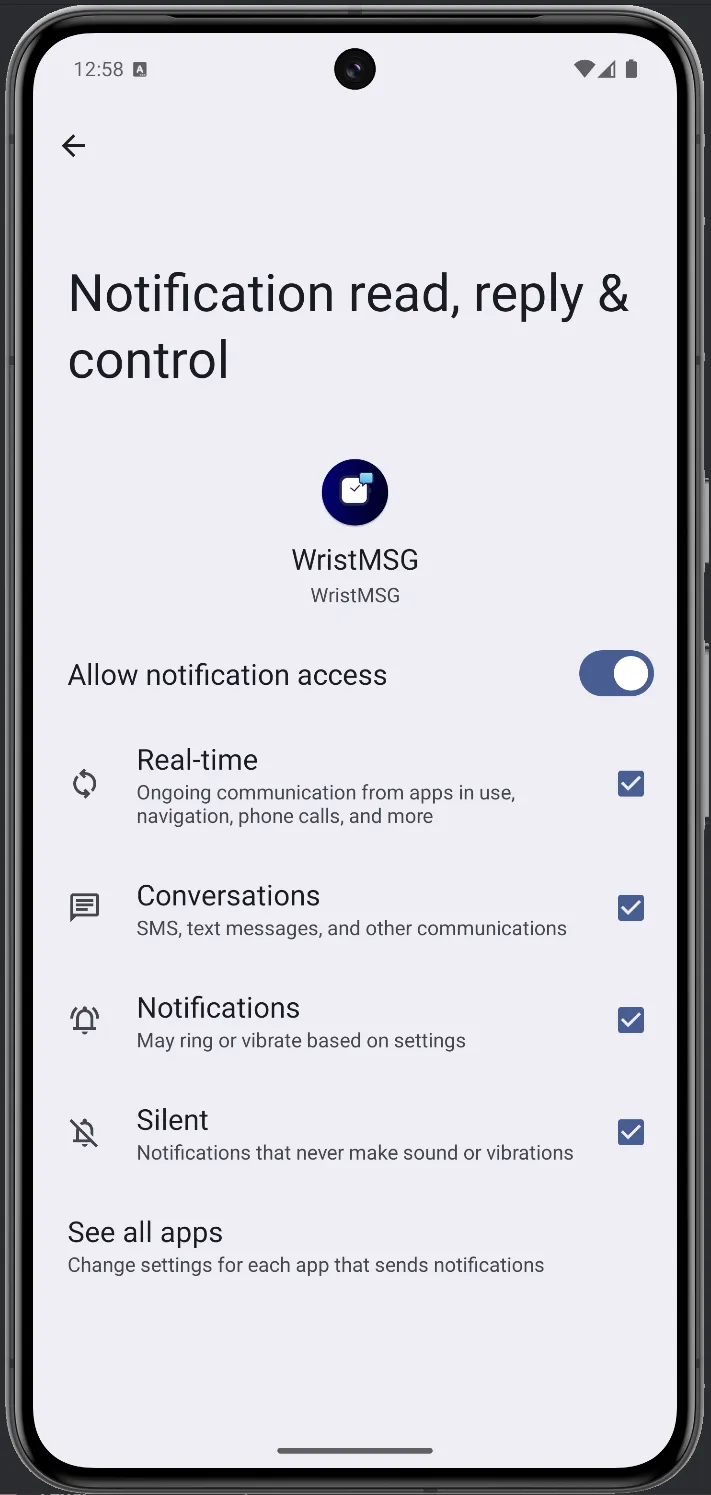
Section titled “Step 5”The toggle turns blue and all four notification categories show checkmarks. Notification access is granted.
Part 2 — Keep-Alive & battery settings
Section titled “Part 2 — Keep-Alive & battery settings”Notification access alone is enough for the app to work. These steps prevent your phone’s battery manager from shutting down WristMSG or Google Chat in the background, which is what causes conversations to drop to Needs Message overnight.
Step 6 — Turn on Keep-Alive
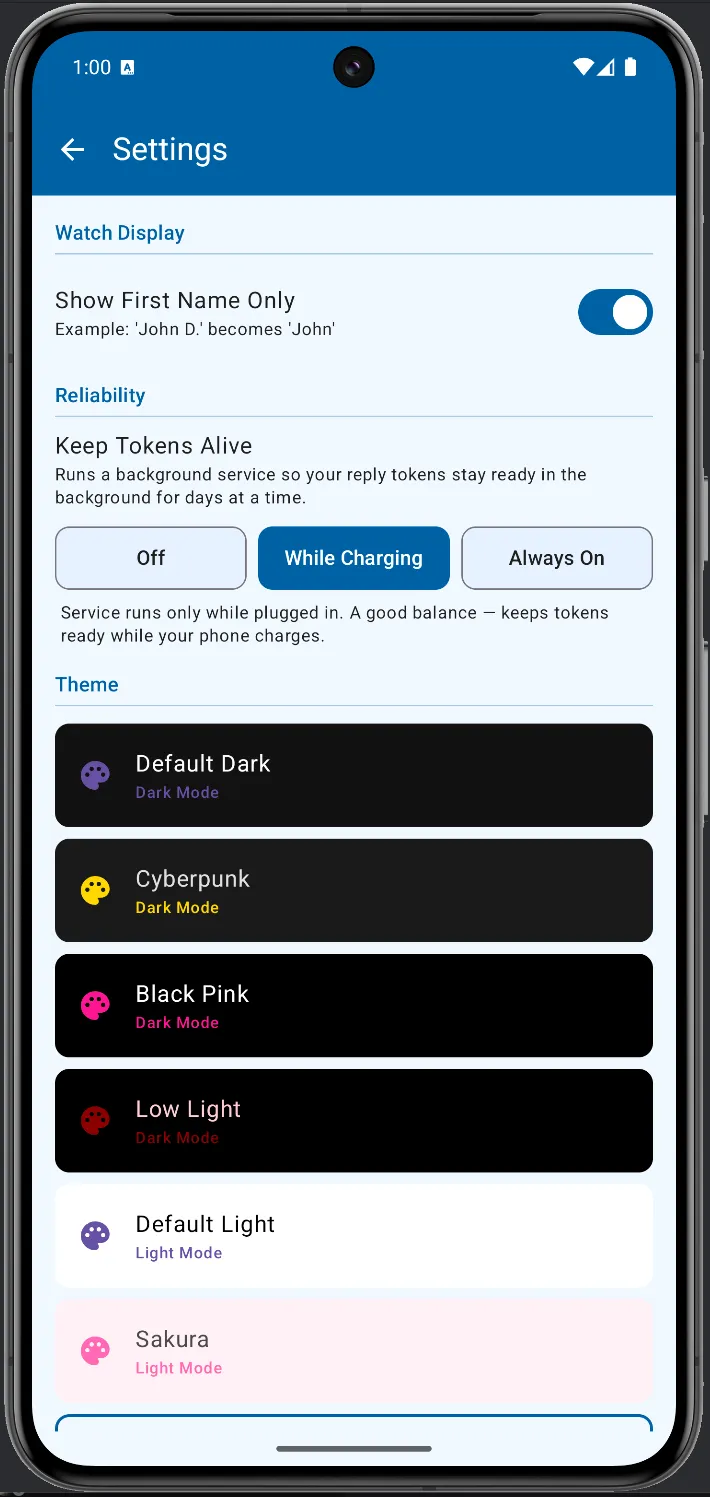
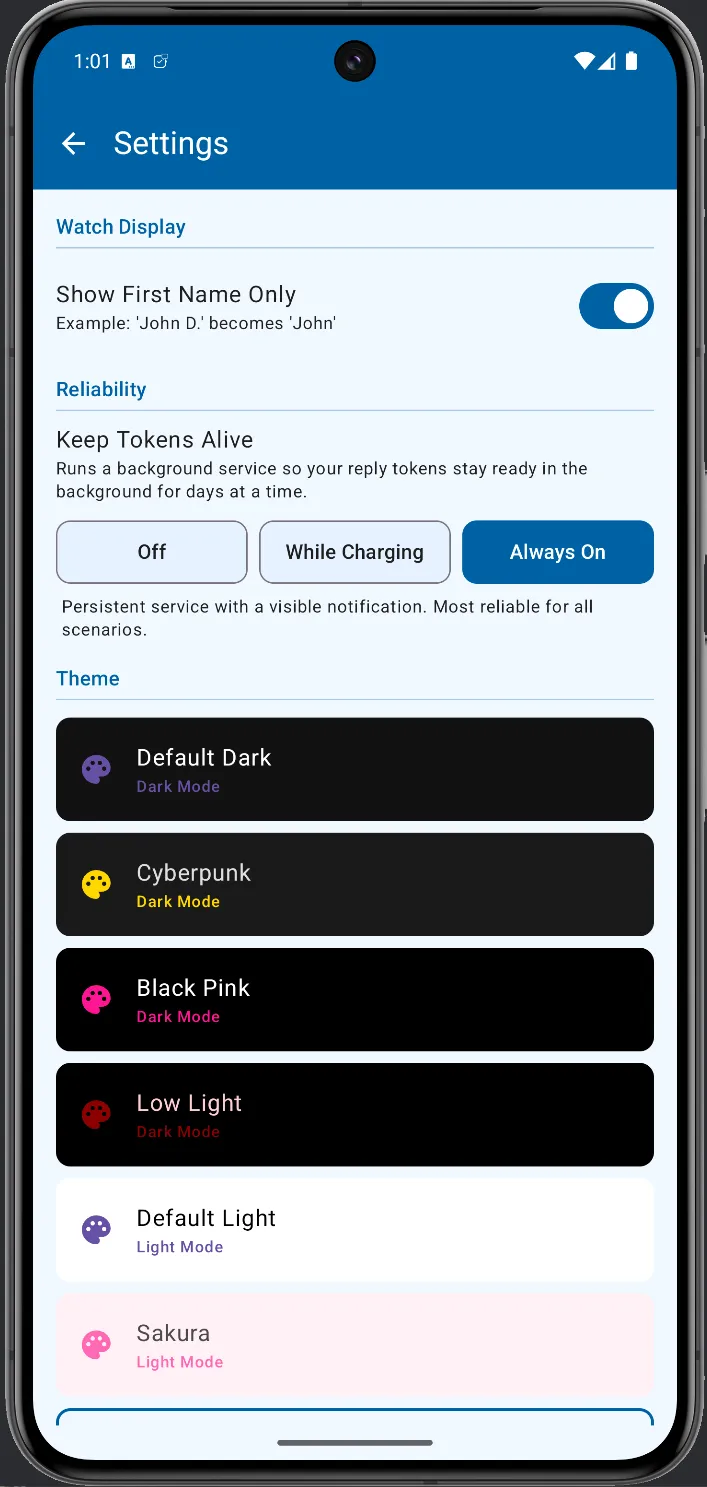
Section titled “Step 6 — Turn on Keep-Alive”Tap the ⚙ icon (top-right corner of WristMSG) to open Settings. Under Reliability, find Keep Tokens Alive and pick an option:
- While Charging — keeps conversations ready while your phone is plugged in. A solid balance for most people.
- Always On — most reliable; runs a persistent background service (you’ll see a small notification while it’s active).
Step 7 — Handle battery optimization
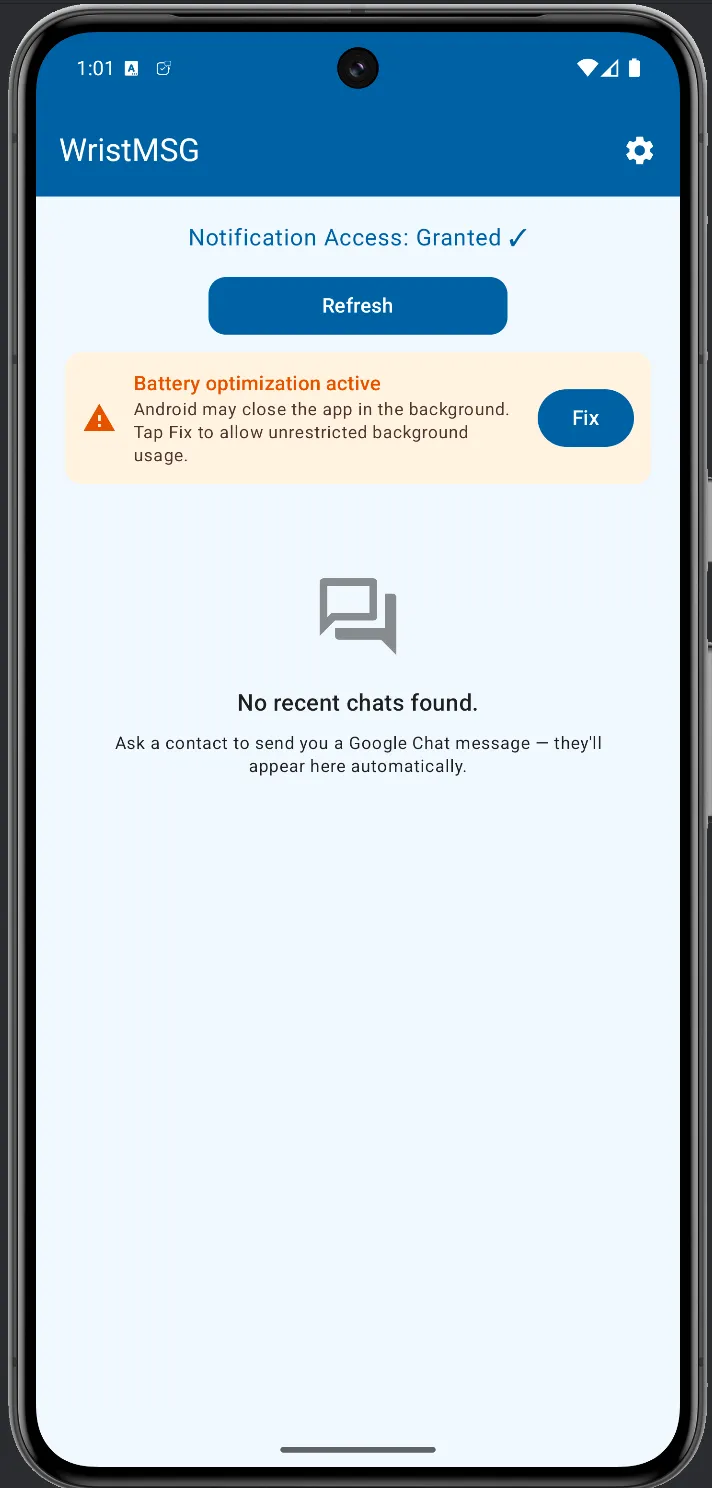
Section titled “Step 7 — Handle battery optimization”Go back to the WristMSG home screen. If Android has battery optimization active you’ll see a yellow warning banner. Tap Fix.
Step 8 — Find WristMSG in battery settings
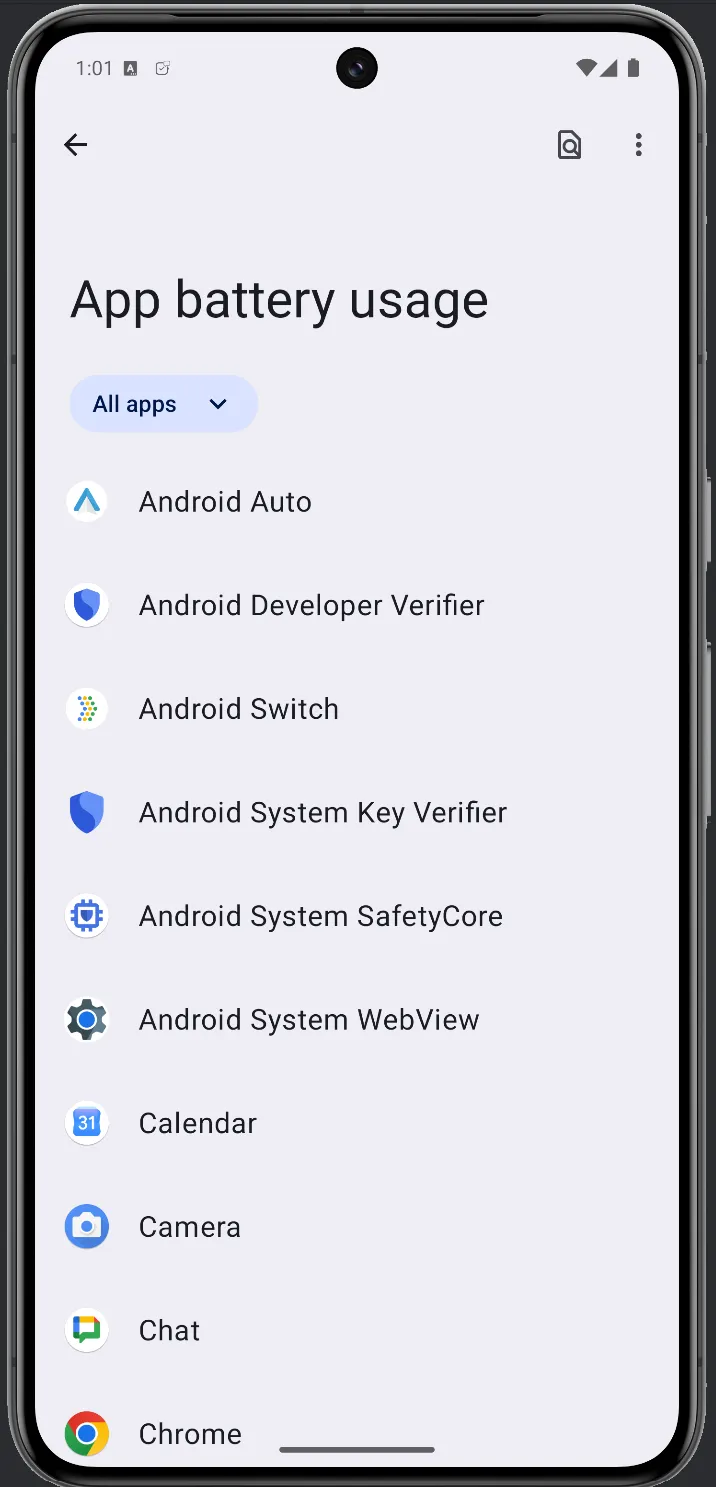
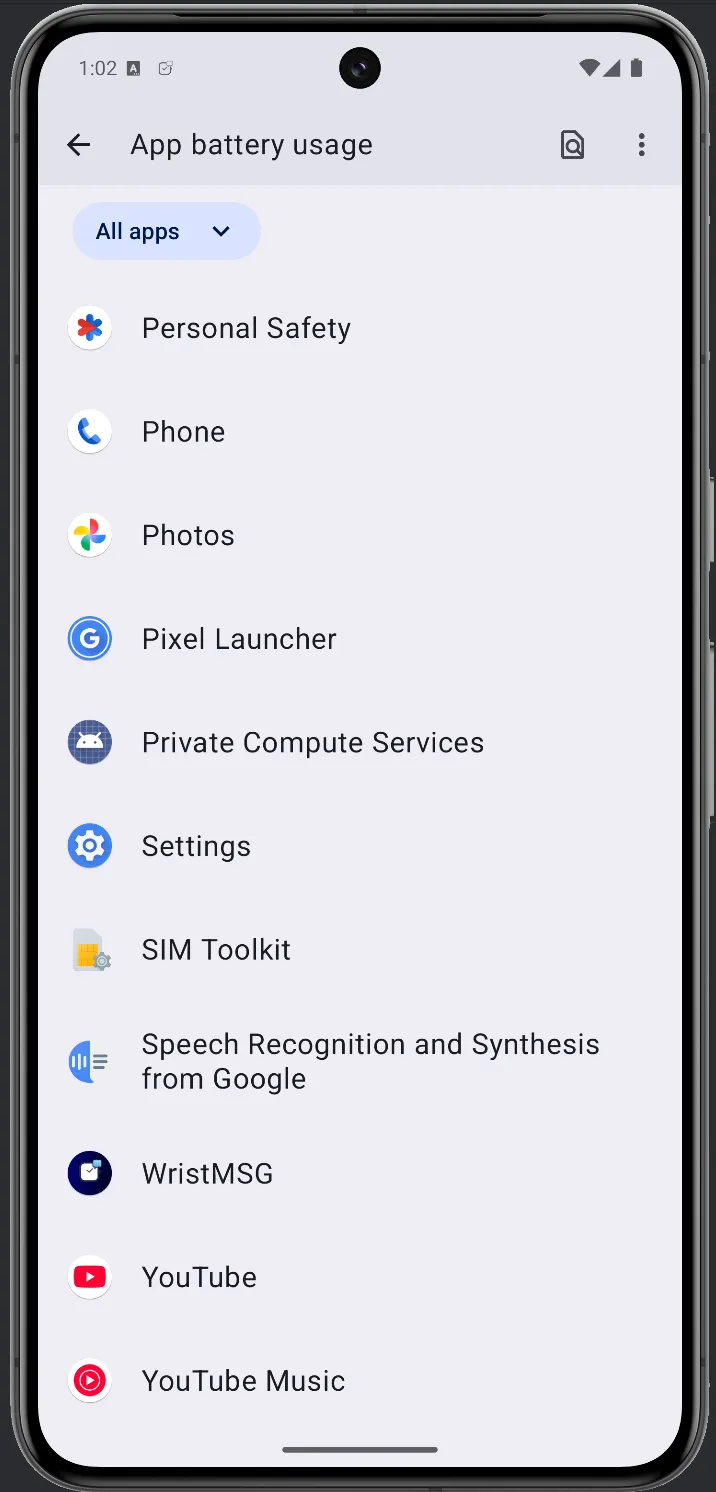
Section titled “Step 8 — Find WristMSG in battery settings”Android opens App battery usage with all your apps listed alphabetically. Scroll down to WristMSG and tap it.
Step 9 — Set WristMSG to Unrestricted
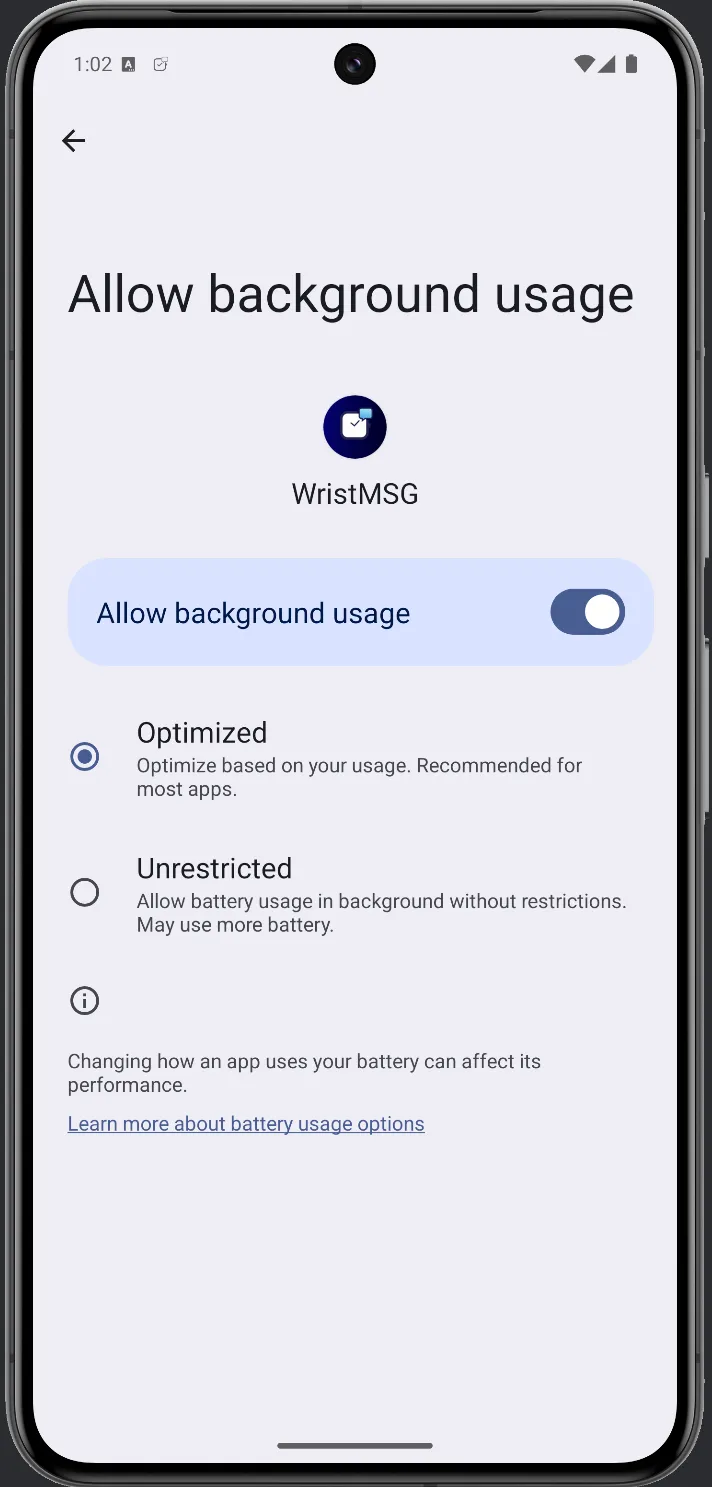
Section titled “Step 9 — Set WristMSG to Unrestricted”You’ll land on the WristMSG app details page. Tap Allow background usage (or Manage battery usage, depending on your Android version).
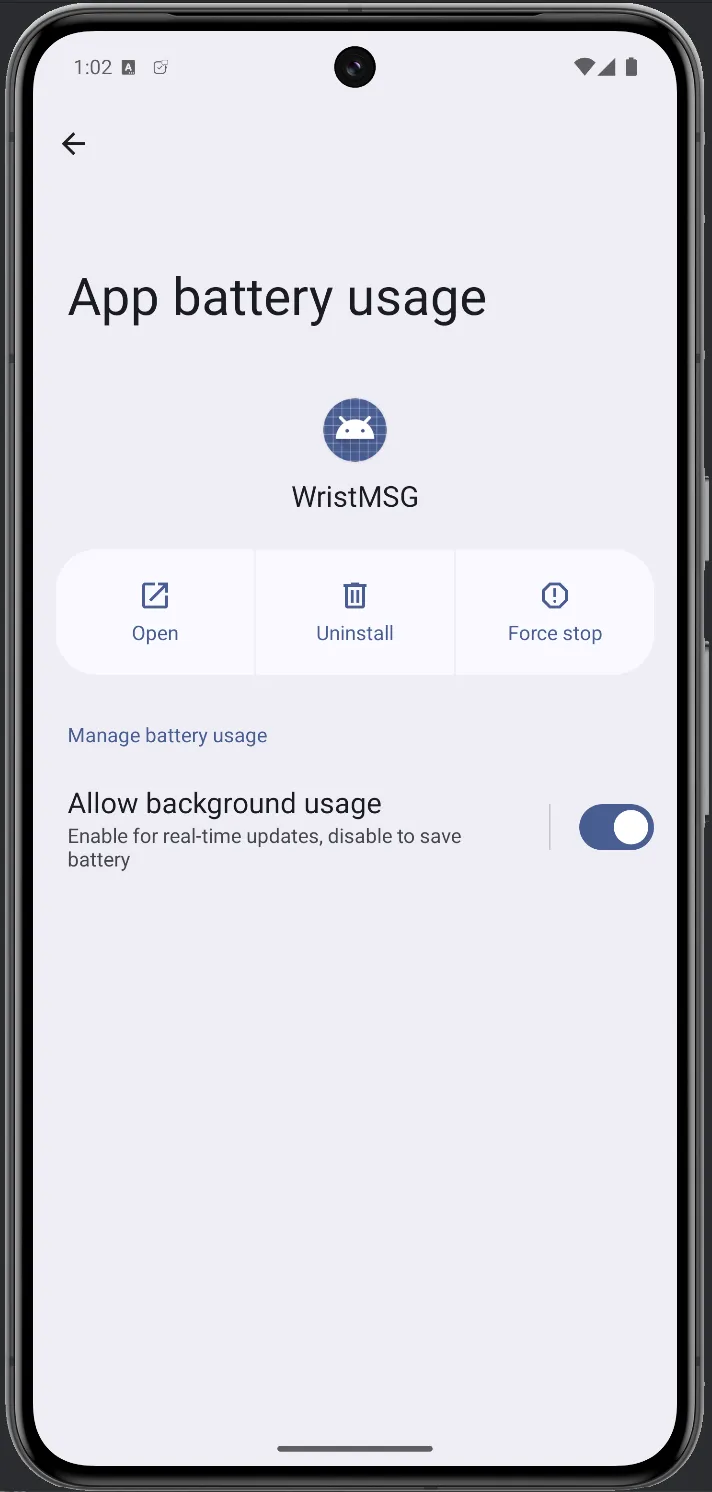
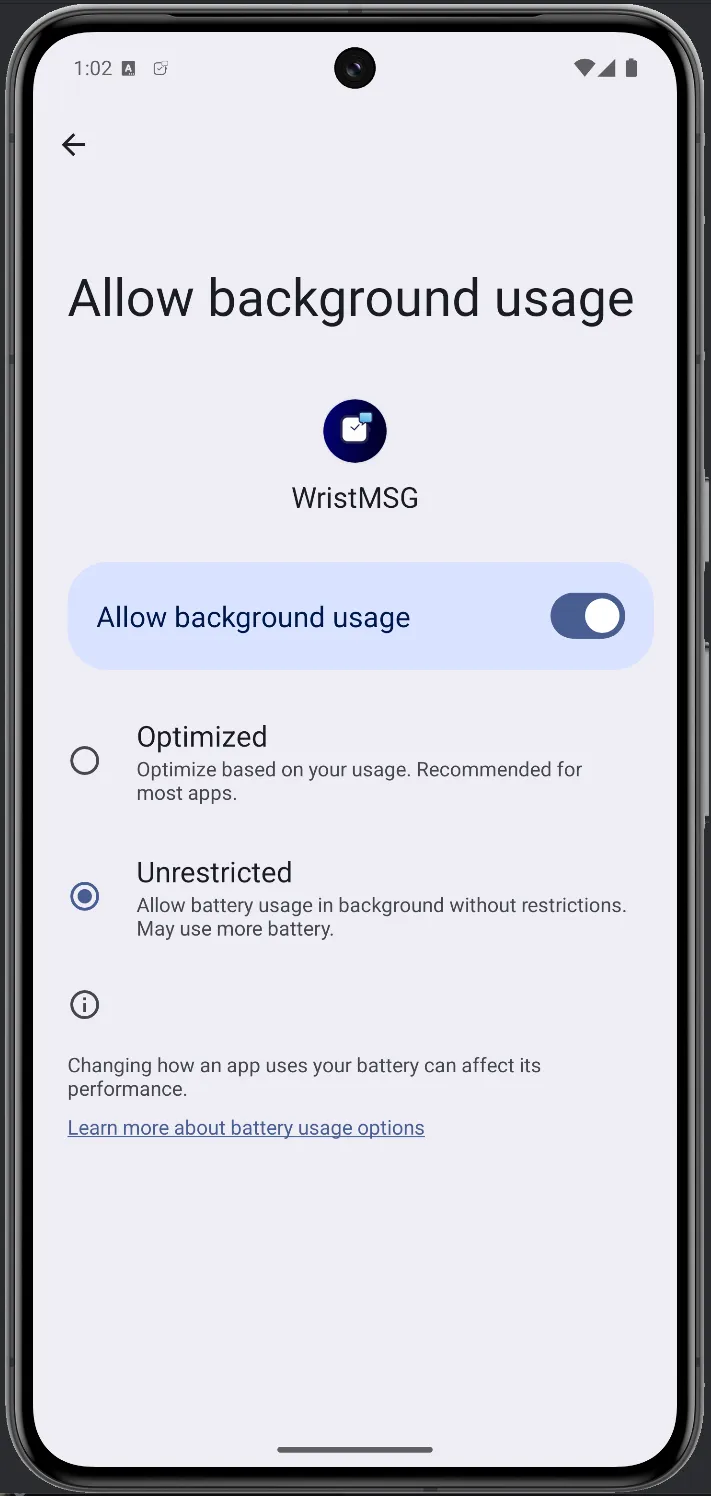
The next screen shows Optimized selected by default. Tap Unrestricted.
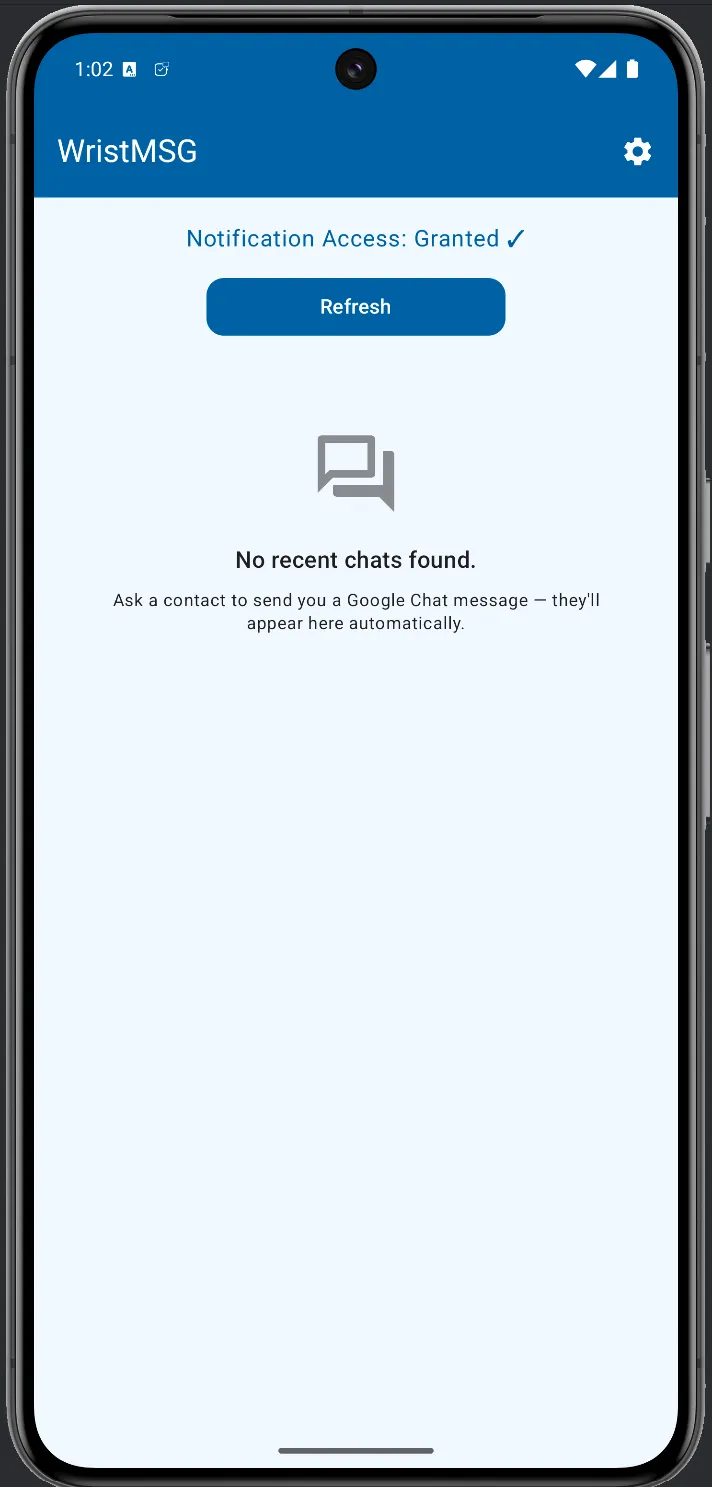
Head back to WristMSG. The home screen shows Notification Access: Granted ✓. Ask a contact to send you a Google Chat message — they’ll appear in the list automatically and be ready to reply from your watch.
Install WristMSG on your watch
Section titled “Install WristMSG on your watch”WristMSG is two apps: the phone app does all the work, and the watch app is the remote. You need both.
Option A — from the phone (easiest): If your watch doesn’t have the WristMSG app yet, the phone home screen shows an Install on watch button. Tap it and the Play Store opens on your watch at the right page.
Option B — from the watch: Open the Play Store on your watch, search for WristMSG, and install it directly.
Once installed, open WristMSG on your watch — contacts sync over from the phone automatically. The watch has nothing to show until the phone side is running, so complete the phone setup above first.